

Another assessment season is in the books, along with the usual flurry of spreadsheets, forms, and the occasional heated debate. One trend that keeps sneaking up on us is the increasing need to capture performances on video. Whether it's for later review, external assessment, or quality control, those folders full of video footage aren't going anywhere.
This, of course, presents a bit of a dilemma – most of us aren't trained videographers. Even those who can expertly capture sound might feel lost when faced with the dizzying array of cameras, lights and accessories out there.
But don't worry, we've got you covered. Let's break it down.
Setting up the shot
Just like with audio, no amount of post-production can salvage a poor initial capture. And since this is assessment material, there's an ethical question about how much, if at all, the raw footage should be edited. The goal is to get it right the first time.
Start with the background. A plain backdrop reduces distractions and makes the subject stand out – crucial if you're assessing a singer's acting or a wind player's embouchure. If your space doesn't lend itself to a clean background, a bit of strategic curtain hanging or some inexpensive photography backdrops (you can snag a 2-square-metre sheet for around £10) can work wonders. On that note, a quick tip: remind students not to wear colours that blend with the backdrop unless they want to pull off a disappearing act on camera. A blue shirt against a blue backdrop is a quick way to make someone look like a floating head!
Lighting is another crucial factor. You don't need a full studio set-up, but do make sure the subject is well-lit. Natural light is your friend – position your performer near a window if possible. If natural light isn't available, or you're recording in the evening, invest in some simple LED lights. Two 60w lights positioned at a 45-degree angle on either side of the subject should do the trick, eliminating harsh shadows and ensuring a clear, flattering image. Again, these start from around £10, and will make an immeasurable difference to the end result.
Framing the shot
Digital cameras come with adjustable zoom features, so think about what you need to capture. For a solo singer, go for the classic MCU – not the latest superhero adventure, but a ‘medium close-up’. Aim to leave a couple of centimetres of space above the head and stop the frame about 5–10cm below the shoulders. This way, the assessor can clearly see all facial movements without any unnecessary distractions.
For instrumentalists, the rule of thumb is to capture from just above the head to about 5cm below the hands, ensuring the full instrument – whether it's the bottom of a clarinet or the scroll of a violin – is in view. This framing allows the assessor to see the performer's technique clearly while maintaining focus on the instrument itself.
When recording groups, you'll need to pull back the camera to ensure everyone is in the frame. Try to keep the camera at eye level and use the zoom to adjust as needed, ensuring that each performer is visible and well-lit. A wide shot might be necessary, but be cautious of capturing too much empty space – it can make the video feel distant and make details difficult to pick out.
It's worth pointing out that there are no marks available for creative camera work; please leave the panning and zooms to Ken Burns!
Budget-friendly options
If you're working on a tight budget, there are still plenty of capture options that won't leave your budget aching.
Camera
The Logitech C920 HD Pro Webcam is a great start. It's affordable, easy to use, and offers full HD 1080p video, perfect for capturing solo performances without the fuss. While it might not have the features of higher-end models, it's more than sufficient for assessment purposes. You can control the zoom and light saturation directly on your computer, allowing for easy shot set-up.
Microphone
For this camera, you will want to pair with an external microphone – it comes with a built-in stereo mic, but designed for speech, with noise cancellation that plays havoc with music capture. The Røde VideoMic GO II is a good option; it's a compact shotgun mic that delivers clear, directional audio – ideal for picking up a singer's voice or the delicate tones of an instrument, but difficult to overload. Plug it directly into your computer for a simple, effective setup.
Lighting
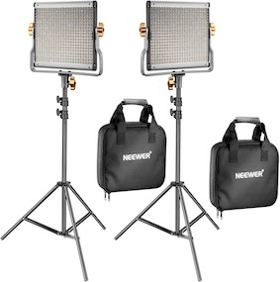
Don't overlook lighting! A couple of Neewer 2-Pack Dimmable LED Video Lights will do the trick. These are budget-friendly, adjustable, and can dramatically improve the quality of your recordings. Position them strategically to eliminate shadows and bring out the best in your performer.
Mid-price option
Mid-range gear offers a significant boost in quality without breaking the bank. This is particularly useful if you're also creating social media or web content, or teaching your students to do so.
Camera
The Sony ZV-1 is a favourite among vloggers and musicians alike. It's compact, versatile, and comes with fantastic autofocus – perfect for capturing dynamic performances. With 4K video and built-in stabilisation, it's a solid choice for those looking to invest a bit more in their set-up.
Microphone
The first thing to say is that the ZV-1 comes with a perfectly serviceable built-in microphone, although you will need to adjust the Audio Record Level (A) for every set. For a more reliable capture, upgrade to the Røde NTG5. It's a professional-grade shotgun mic that offers superb sound quality, especially for outdoor or challenging acoustic environments. It's lightweight, making it easy to position and adjust as needed.
Lighting
The Godox SL-60W LED Video Light is a solid mid-range option. It's powerful, consistent, and provides a daylight-balanced output, making your recordings look clean and professional. Add a softbox to diffuse the light for a more flattering, even glow.
High-end equipment
For those who want the best of the best, investing in high-end gear can really elevate your recordings.
Camera
The Canon EOS R5 is a top-tier mirrorless camera that delivers stunning 8k video quality. It's a serious investment, but if you're looking for crystal-clear footage, this is it. With incredible dynamic range and low-light performance, it's the go-to for professional videographers.
Microphone
The Sennheiser MKH 416 is the gold standard for shotgun mics. It's highly directional and offers pristine audio capture, making it ideal for professional-grade recordings. Whether indoors or out, this mic delivers consistent, high-quality sound.
Lighting
The Aputure Light Storm C300d II is a high-end LED light that offers incredible brightness and colour accuracy. It's what the pros use – and for good reason. With adjustable colour temperature and a powerful output, this light can transform your recording space into a professional studio.
Monitoring your recordings
Once you've set up your gear, you'll want to keep an eye (and ear) on your recordings as they happen. This is where monitoring comes in.
- Headphones. Invest in a good pair of closed-back headphones, like the Sony MDR-7506 or Beyerdynamic 770. They're industry standard for a reason – providing accurate sound reproduction and excellent isolation, so you can catch any issues in real-time. Monitoring your audio live allows you to adjust mic placement or levels on the spot, ensuring you capture the best possible sound.
- External monitor. If your camera supports it, consider using an external monitor like the Feelworld FW568. This allows you to see exactly what's being captured, helping you adjust framing and focus on the fly. With a larger screen, you'll catch details that might be missed on a smaller camera display, ensuring a sharper, more precise recording.
- Boom mics. The Røde NTG3 is great for capturing directional sound. Position the mic just out of the frame, angled toward the sound source. For group performances, a boom mic on a stand can effectively capture the ensemble without picking up too much background noise.
Final tips and tricks
Test, test, test: always do a test run before recording the real deal. This allows you to catch any issues with framing, lighting, or audio levels. Ask the performer to run through a portion of their piece while you record, then play it back to check for any adjustments needed.
- Keep it simple. Don't overcomplicate things. Focus on capturing clean, clear footage and audio.
- Backup everything. Invest in a good external hard drive like the WD My Passport for backing up your recordings. You'll thank yourself if anything goes wrong.
- Mind the details. Small details can make a big difference. Pay attention to the cleanliness of the recording space, any extra material in shot.
Finally, don't forget to set expectations. An exam scenario is nerve-wracking enough for most students. Adding the pressure of being recorded can easily push them over the edge. Build in time for them to relax and get used to the set-up. Try a few dry runs, leading up to the final assessment, and get students to watch their video footage back. This is an invaluable learning experience, not just for performers, but for us as fledging cinematographers. Good luck!


