

Annotate with comments
The comments feature is a simple but highly effective way to communicate with your students within a score. It allows you to add a sticky note with a text comment at a specific place in the score that can be viewed by other users.
To add a comment to a score, go to the Review tab and click on ‘new comment’. You can also use a keyboard shortcut depending on your operating system: ‘shift+alt+C’ on a PC or ‘shift+option+C’ on a Mac. Then click on the score where you would like to insert a comment and Sibelius will create a new sticky note headed by your name where you can type your comment. When you are done, you can exit the comment by pressing the escape key.
Alternatively, you can highlight a section of the score before creating the comment. If you select a part or passage of the score before creating the comment, Sibelius will automatically add the name of the instrument and measure numbers to the top of the sticky note. If multiple staves are selected, Sibelius will list all of the included instruments in the newly created comment. To edit an existing comment, simply double-click in the body of the sticky note and alter the text. To delete a comment, simply select it and press the delete key.
Any comments you add will all be the same colour. When your student opens the score on their computer, Sibelius will automatically select a different colour for any comments that they add to the score, making it easy to distinguish between comments created by different people (see Fig 1).
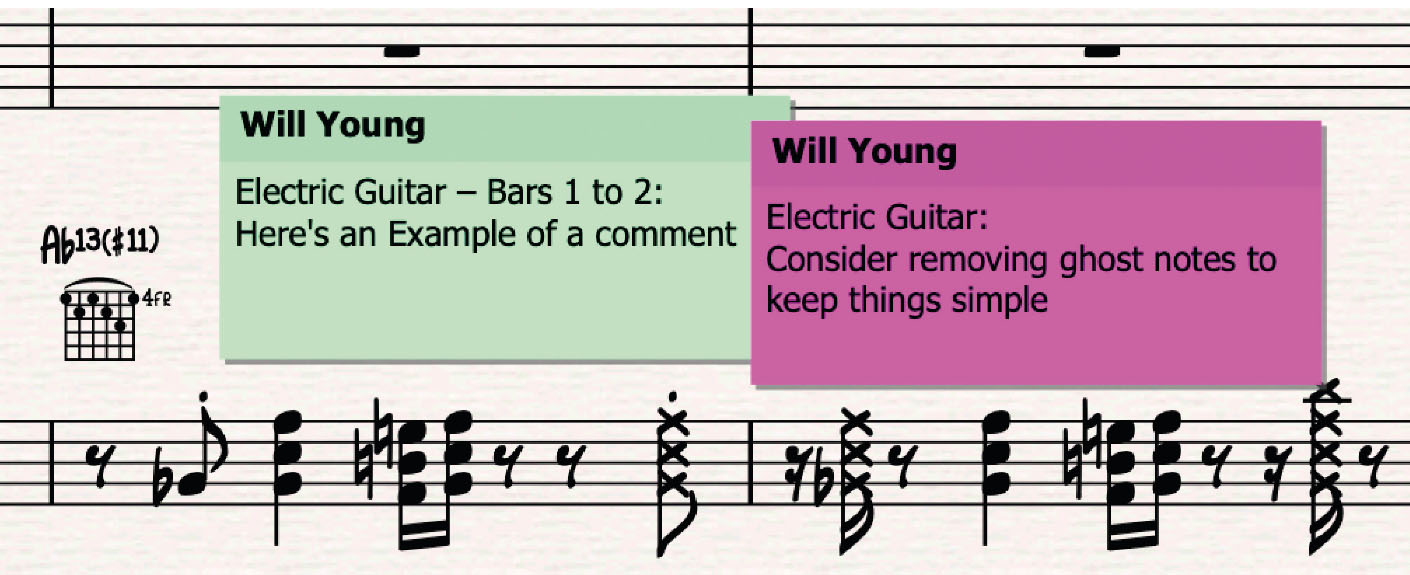
Fig 1
To tidy-up your screen while working on a score, you can minimize comments by double-clicking on the comment header. This will reduce the size of the comment, leaving just the initials of the author showing. Double-click on a comment again to return it to full size. You can also completely hide all comments from the score by going to the View tab and unchecking the ‘comments’ tick box in the ‘invisibles’ section. Ticking the box will toggle them back on. Make sure this box is ticked if you want to print the score with comments.
Once you have a few comments in a score you can easily navigate between them by using the ‘next comment’ and ‘previous comment’ buttons on the Review tab. This is a great tip to show to your students, as it will enable them to quickly toggle through their score directly to the parts that need attention.
Making use of highlights
Like comments, highlights can also be used to help students when analysing a score. You could highlight a recurring motif, or show how different instrument parts interact with one another across multiple staves. Highlights can also be used to remind students which sections they need to work on, and can also be used in conjunction with comments.
To add a highlight go to the Review tab. Click on ‘highlight’ and then click and drag along a section of the score. You can also select a passage first and then click highlight. You can only highlight a single instrument at a time, so if you want to highlight parts across staves you will need to apply the highlight individually to each part.
You can easily resize highlights at any time by clicking and dragging the ends (Fig 2).

Fig 2
The default colour of the highlight is yellow but you can change it by going to the Home tab, selecting ‘colour’ and choosing an alternative. Choosing different colours can be very helpful for highlighting repeating sections. For example, if you wanted to bring attention to a repeating motif you can colour each repetition of the motif in a certain colour so that they all stand out from any other highlighted passages.
Just like the comments, you can toggle highlights on and off in the View tab by checking or unchecking the box marked ‘highlights’ and this selection will apply when printing a score (Fig 3).
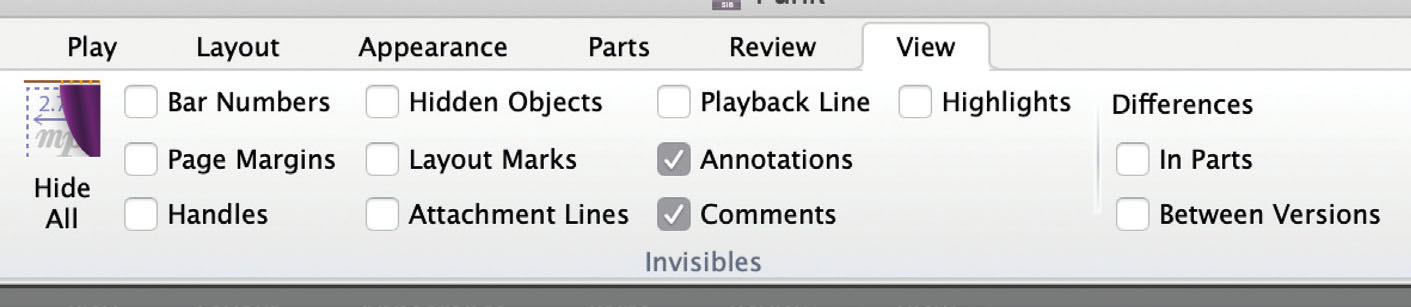
Fig 3
Keeping track of timeline
The timeline feature shows landmarks in your score such as rehearsal marks, key signatures, time signatures, and tempo markings and it allows you to navigate your score quickly and easily.
You can switch on the timeline in the View panel. Once active, you can jump around your score by clicking on different parts of the timeline (Fig 4).
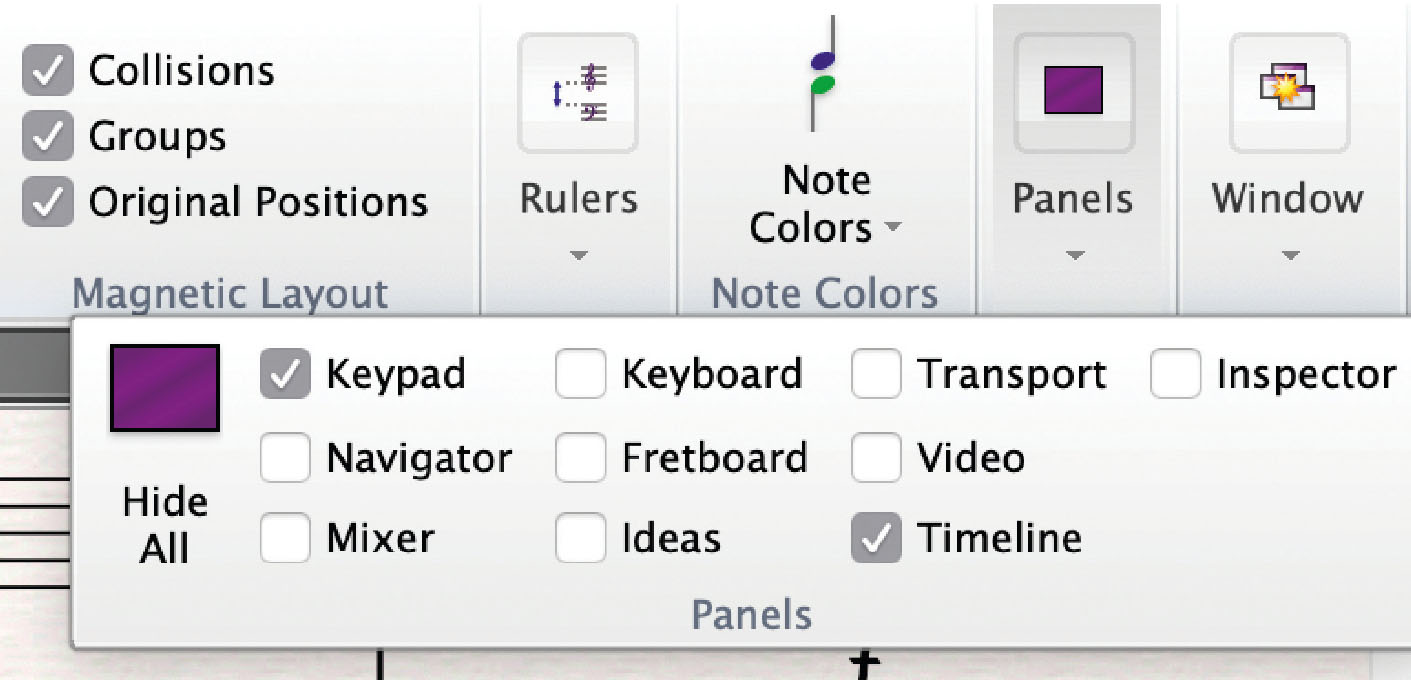
Fig 4
You can mark sections of the score in the timeline overview by adding text to the score. Navigate to the part of the score you want to highlight and go to the Text tab. In the ‘styles menu’ scroll down to ‘general’ and choose ‘musical structure text’. Then type a name for your section and press the escape key. This name will now show up in the timeline (Fig 5).
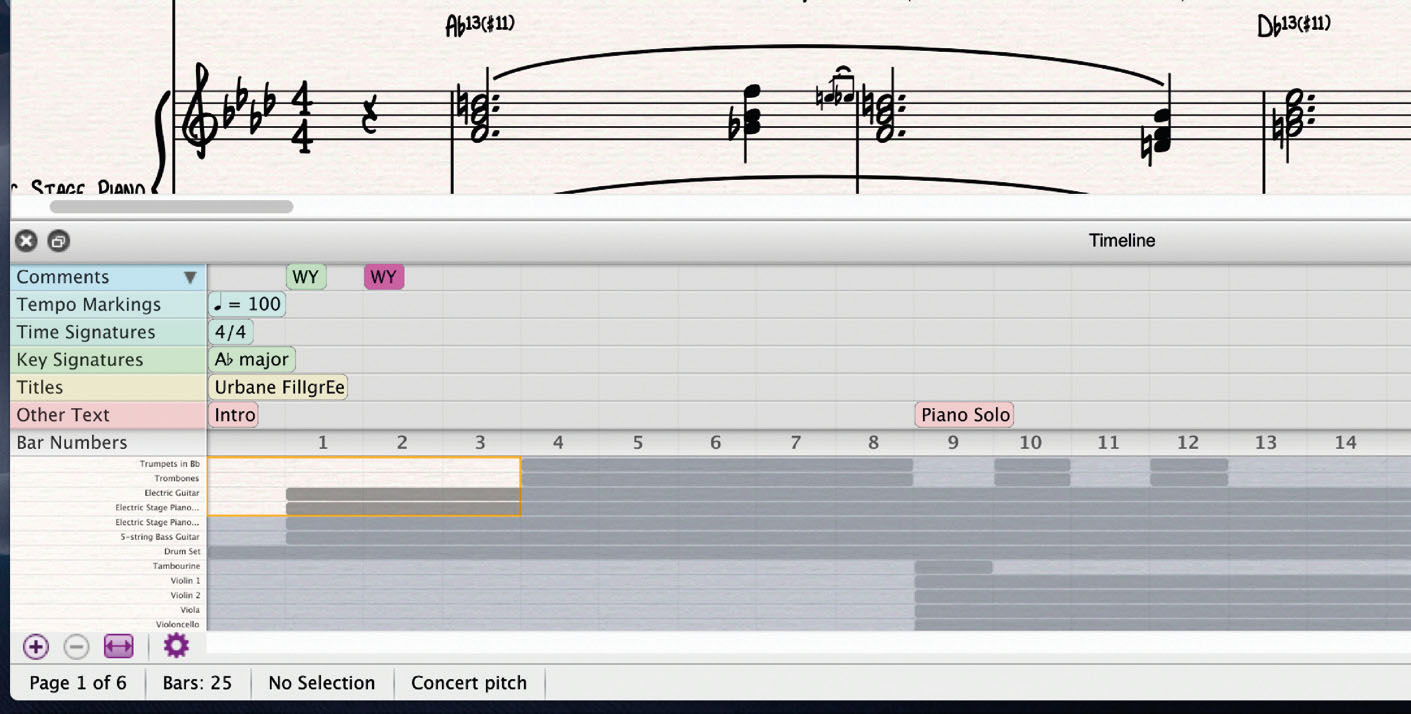
Fig 5
The timeline is also useful for giving you a bird's-eye view of any comments that have been added. Comments appear as icons in the timeline and you can hover your mouse over the icon to read the complete text.
In summary, the comments, highlights, and timeline view offer useful methods of communication between students and teachers and enable users to quickly give feedback or act upon advice and guidance. By mastering these tools, you can streamline the marking of digital scores with clear annotations and faster navigation in Sibelius.
More information can be found on the avidblogs.com site, which features a helpful series on getting started with Sibelius as an educator.


