

How do you mic up and use a sound system at school? I feel this is the ultimate music or music-tech department question. Several other core questions come out of it. How can I achieve good sound for my show? How can I avoid feedback? And given there are a huge number of mics and equipment types out there, what do I actually need? Although I don’t have individual answers tailored to your specific performance spaces, I do have a collection of tips refined from experience. I hope they assist you in making informed decisions and achieving excellent sound quality for your school’s stage production. With careful planning and attention to detail, you can ensure a successful and well-balanced audio experience for your audience.
Choosing and placing microphones to capture the stage
Lavalier (lapel) mics
Setting up microphones effectively for a school production requires careful consideration of both selection and placement to ensure clear sound while avoiding feedback issues. Lavalier microphones, also known as lapel or gooseneck mics, are an excellent choice for the main cast. These microphones offer several advantages. First, they can be discreetly hidden, especially if you use black versions, and can be attached to clothing or embedded in hair.
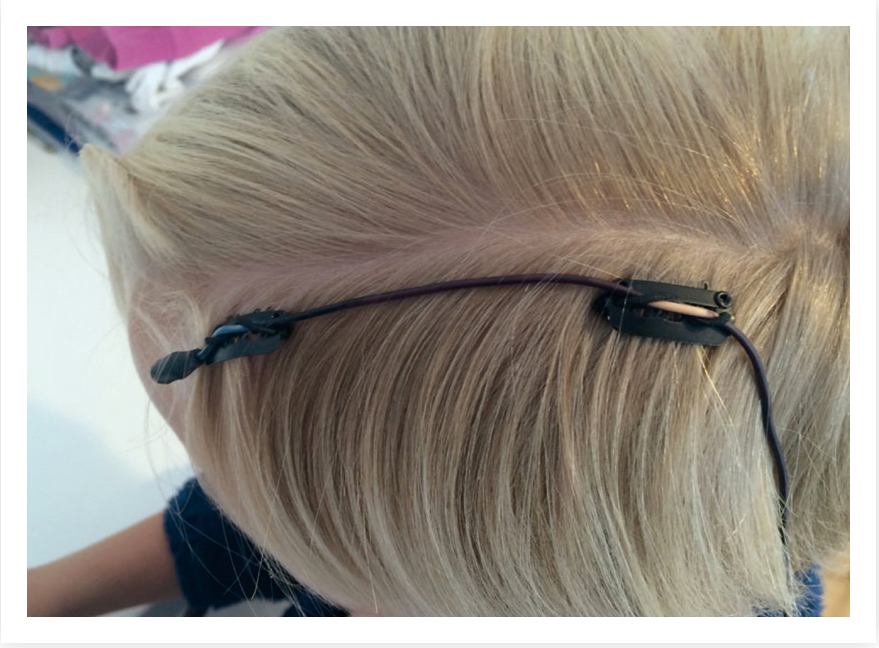 Lapel mics are an excellent choice for the main cast
Despite some misconceptions about their placement, lavalier mics have an omnidirectional pickup pattern, which means they capture sound from all directions. This design helps maintain clear audio, even if the microphone moves slightly during a performance. Additionally, when attached close to the body, such as on a jacket collar, the body itself absorbs extraneous background noise, resulting in a cleaner sound pickup. Many of these microphones are wireless, which is essential for performers who need to move around the stage, with the mic lead connecting to a wireless pack that can be clipped to a belt or pocket.
Boundary mics
Boundary microphones, or Pressure Zone Microphones (PZM), are another effective option for covering larger stage areas. By placing three PZM mics on plexiglass panels at strategic points – left, centre and right at the front of the stage – you can achieve broad coverage. PZM mics are valued for their ability to avoid phase cancellation and ensure full sound projection from PA speakers to the audience. They typically have a flat frequency response, particularly in the high frequencies, which aids mixing and reduces feedback.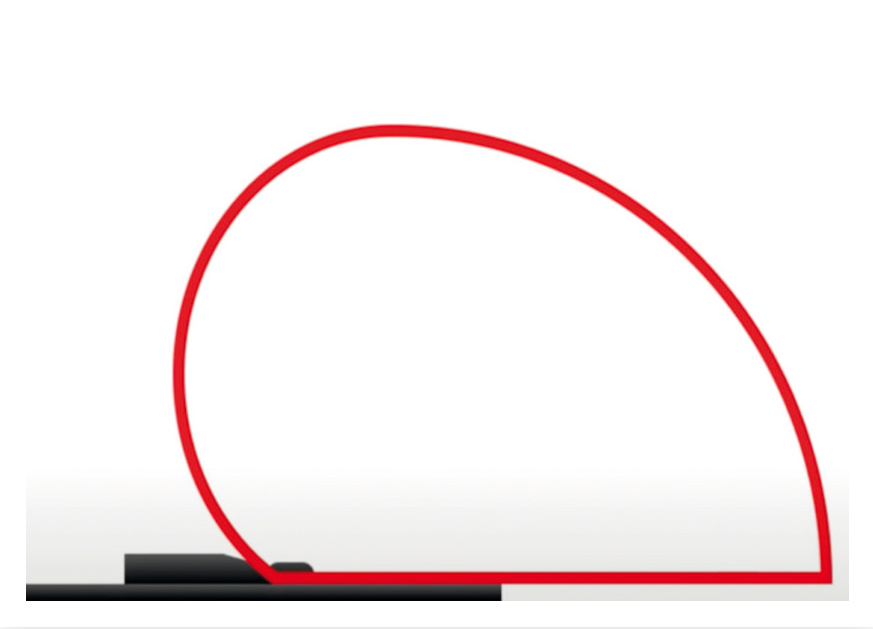 On-stage boundary mics, for stage pickup coverage
While PZM microphones generally have an omnidirectional pickup pattern, the plate design often results in a hemispherical pickup pattern. For better feedback rejection, you might consider boundary mics with cardioid or supercardioid capsules, which provide a more controlled half-hemispherical pickup pattern. These mics are also resilient to mechanical noise, meaning they will pick up dance footwork without capturing unwanted stage thumps. They can also be used on props such as pianos or lecterns, where their design helps avoid phase issues from reflections.
Pitfall of overhead mics
While they might seem like a good solution, overhead microphones generally require careful setup and can be expensive. Overhead mics are positioned further from the sound source than those on a stand, leading to the potential for increased ambient noise. Additionally, these microphones might pick up more sound from the PA system than desired, heightening the risk of feedback. Overhead mics also face challenges when it comes to capturing voices effectively, due to body movements blocking sound frequencies. Unless you have the budget and expertise to plan their setup precisely with an acoustic engineer, it’s often better to allocate resources to other types of microphones and sound equipment that offer more reliable performance.
Choosing the right mixing desk
Selecting the right mixing desk is crucial for balancing and controlling sound during a performance. Determining the number of inputs you need depends significantly on the size of your performance space and your budget. For most school productions, a 32-input mixer is a safe choice. The Yamaha TF5, for instance, is an excellent option for large-scale shows, whether indoor or outdoor. It offers 32 mic/line inputs along with two stereo line inputs, which is usually more than sufficient. However, if you have a live band or orchestra and are also using backing-tracks, this number might vary.
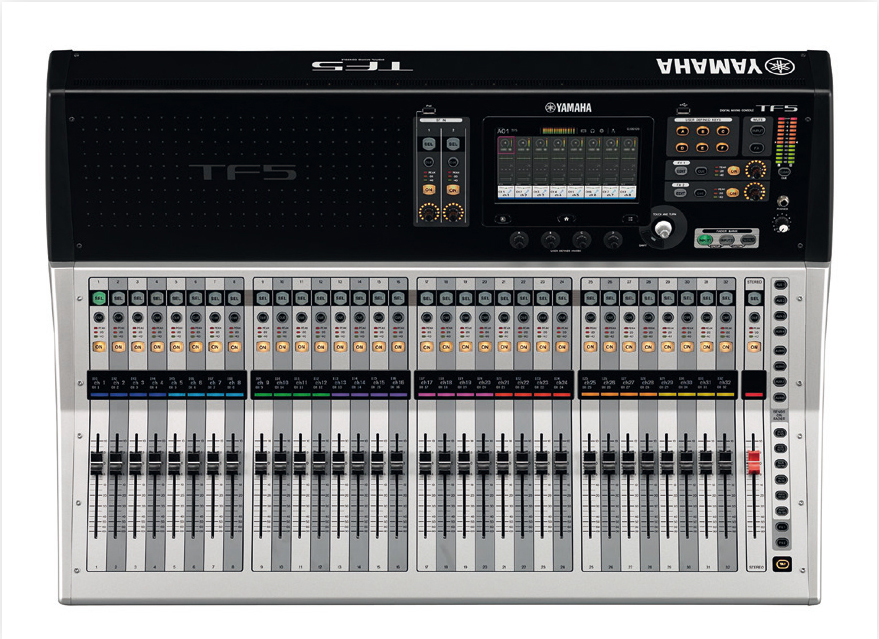 A digital mixing desk with 32+ inputs is ideal for large-scale shows
When deciding between an analogue and a digital mixer, it’s essential to weigh up the advantages and drawbacks of both. Analogue mixers are generally more intuitive and user-friendly, featuring a straightforward layout with physical knobs, sliders and buttons. This simplicity makes them easier for beginners to operate and provides a warm, natural sound preferred by many audiophiles. They are often more affordable for basic setups and are less prone to software issues. However, analogue mixers lack the advanced features of digital mixers, such as built-in effects, scene recall and digital processing. They can be bulkier and involve complex cable management, and changing setups can be time-consuming due to the absence of digital recall functions.
Digital mixers, on the other hand, offer a range of advanced features including built-in effects, equalisation, compression and gating. They allow for saving and recalling different setups, which is particularly useful for varied performances. Digital mixers are typically more compact and lighter, making them easier to transport and set up. They often include multitrack recording and can be controlled remotely via tablets or computers, providing a cleaner sound with lower noise levels. Despite these advantages, digital mixers can be overwhelming for beginners due to their complexity and reliance on software, which can occasionally be prone to glitches. They are also generally more expensive initially but can be costeffective over time by reducing the need for additional processors. Digital mixers might introduce minimal latency and be sensitive to power fluctuations, so they are best suited for more complex setups where long-term flexibility is required.
Managing feedback
In live performances, managing feedback is essential for maintaining sound quality. Equalisation (EQ), compression and gating are key tools in this process.
EQ is used to adjust the tonal balance of audio by enhancing or reducing specific frequencies. For example, if voices sound muddy, cutting some low frequencies (below 100 Hz) can help clarify them. Conversely, if the sound is harsh, reducing high frequencies (above 10 kHz) can smooth it out. To prevent feedback, use a parametric EQ to identify and reduce frequencies that are prone to feedback, typically found in the mid-range (around 1–3 kHz). Lowering the gain for these frequencies can help prevent feedback while preserving overall sound quality.
Compression manages volume levels by reducing the loudest parts of the audio and boosting quieter sounds, resulting in a more consistent output. Set the compressor’s threshold just above the typical audio level to catch loud peaks and avoid distortion. A ratio of around 3:1 to 4:1 is often effective for controlling dynamic range without overly squashing the sound. To prevent feedback with compression, ensure the compressor handles peaks effectively by setting a fast attack time and a moderate release time. This approach helps avoid amplifying feedback during loud segments while maintaining natural sound dynamics.
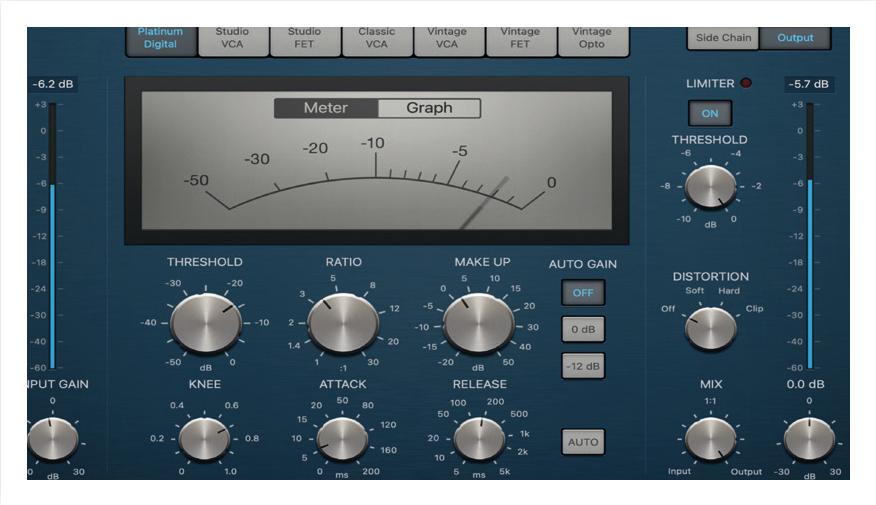 Compressor settings, for controlling volumes and balanced voices
Gating reduces background noise by cutting off audio signals below a certain threshold. Set the gate’s threshold so it only opens for significant audio signals, such as voices or instruments. Start by setting the threshold slightly above the ambient noise level. To prevent feedback with gating, adjust the gate’s release time to ensure it closes smoothly, avoiding abrupt cut-offs that could affect audio quality. Make sure the gate opens for essential sounds while closing quickly to eliminate any residual noise that might contribute to feedback.
Additional considerations include careful microphone placement to avoid feedback. Position microphones away from speakers and use directional mics to minimise feedback risk. Aim speakers away from microphones and place monitors correctly to avoid direct sound paths that could cause feedback. Maintain controlled volume levels to prevent excessive gain and feedback, and conduct regular sound checks to identify and resolve potential issues before performances.
Managing distance and placement for PA systems
In larger venues, you may need multiple speakers to cover the entire audience area effectively. A typical setup might include two or more full-range speakers with 12- to 15-inch cones. You might also consider using a combination of main speakers and stage monitors to ensure that performers can hear themselves clearly. Full-range speakers are designed to handle a broad range of frequencies, including both low and high tones. They are suitable for most applications and can provide clear audio for dialogue, music and sound effects. Monitor speakers, on the other hand, are used on stage to ensure performers can hear themselves. They are often placed on the floor facing the performers. The size of monitors can range from 8 to 12 inches.
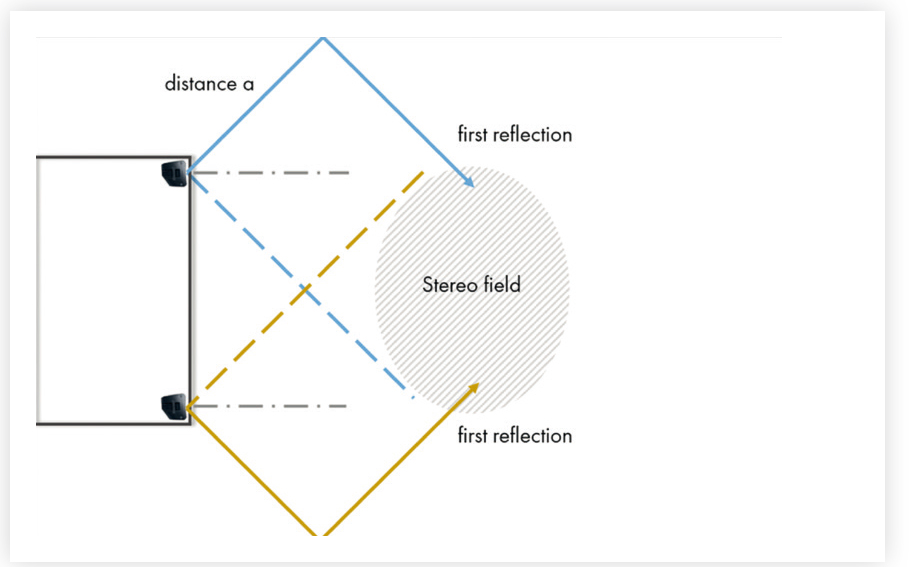 Typical speaker placement for a larger venue
Subwoofers and monitors
For purely dialogue-based productions, a subwoofer might not be necessary. However, if your school production features a live band, orchestral music, or recorded tracks with substantial bass, a subwoofer can enhance the listening experience by providing richer bass tones. Subwoofers come in various sizes, ranging from 10 to 18 inches. For a school production, a 12- or 15-inch subwoofer is usually adequate, offering a good balance between size and performance.
To reduce feedback in a school production, managing the distance between microphones and PA speakers is crucial. Dynamic microphones should be placed at least 2–3 metres (6–10 feet) away from PA speakers, while condenser microphones, being more sensitive, should ideally be 3–5 metres (10–16 feet) away. Avoid placing microphones directly in front of or facing the speakers. Using directional microphones, such as cardioid types, allows for closer placement without picking up unwanted sound from the sides. For stage monitors, maintain a distance of at least 1.5–2 metres (5–6 feet) to prevent feedback. Conduct thorough sound checks to fine-tune distances and angles based on your specific setup, and ensure speakers are angled away from microphones to further reduce feedback risk.
Finally, if your production includes a pit band, consider using speaker wedges to ensure that the conductor and musicians can hear cues and maintain coordination. Alternatively, in-ear monitors connected to a console stereo output can help maintain unity across different areas of the performance space.


